Using Windows Screen Readers on a Mac
Using Windows Screen Readers on a Mac
It is possible to test Windows screen reader accessibility on a Mac, in a virtual machine such as Parallels, VMWare, or Apple Bootcamp, but you will need a hardware or software workaround to make up for the lack of an Insert key on the Mac, because the Insert key is the main default modifier key used by screen readers on Windows.
Note:
Before trying any of the methods below, you may want to configure NVDA to use "Laptop" keyboard layout in the NVDA menu (NVDA+n) => Preferences => Keyboard Settings since the desktop layout relies on many keys which do not exist on some Mac keyboards (depending on your computer and/or keyboard model).
Option 1: Hardware
Use an external keyboard that has an insert key. There are many external keyboards you can plugin or that use Bluetooth to connect to your Mac. This option is more expensive, but also more reliable. If you are going to be using Windows screen readers a lot on your Mac, this is probably the best option.
Option 2: Software - SharpKeys
One option to remap an unused key to the missing insert key is by using an open source program called SharpKeys. SharpKeys is a utility that manages a Registry key that allows Windows to remap one key to any other key. Included in the application is a list of common keyboard keys and a Type Key feature to automatically recognize most keyboard keys.
- Open your virtual machine program and download and install SharpKeys.
- Run the SharpKeys program and click the "Add" button

. - Click the "Type Key" button and press the key you want to replace. That key will be highlighted on the left column.
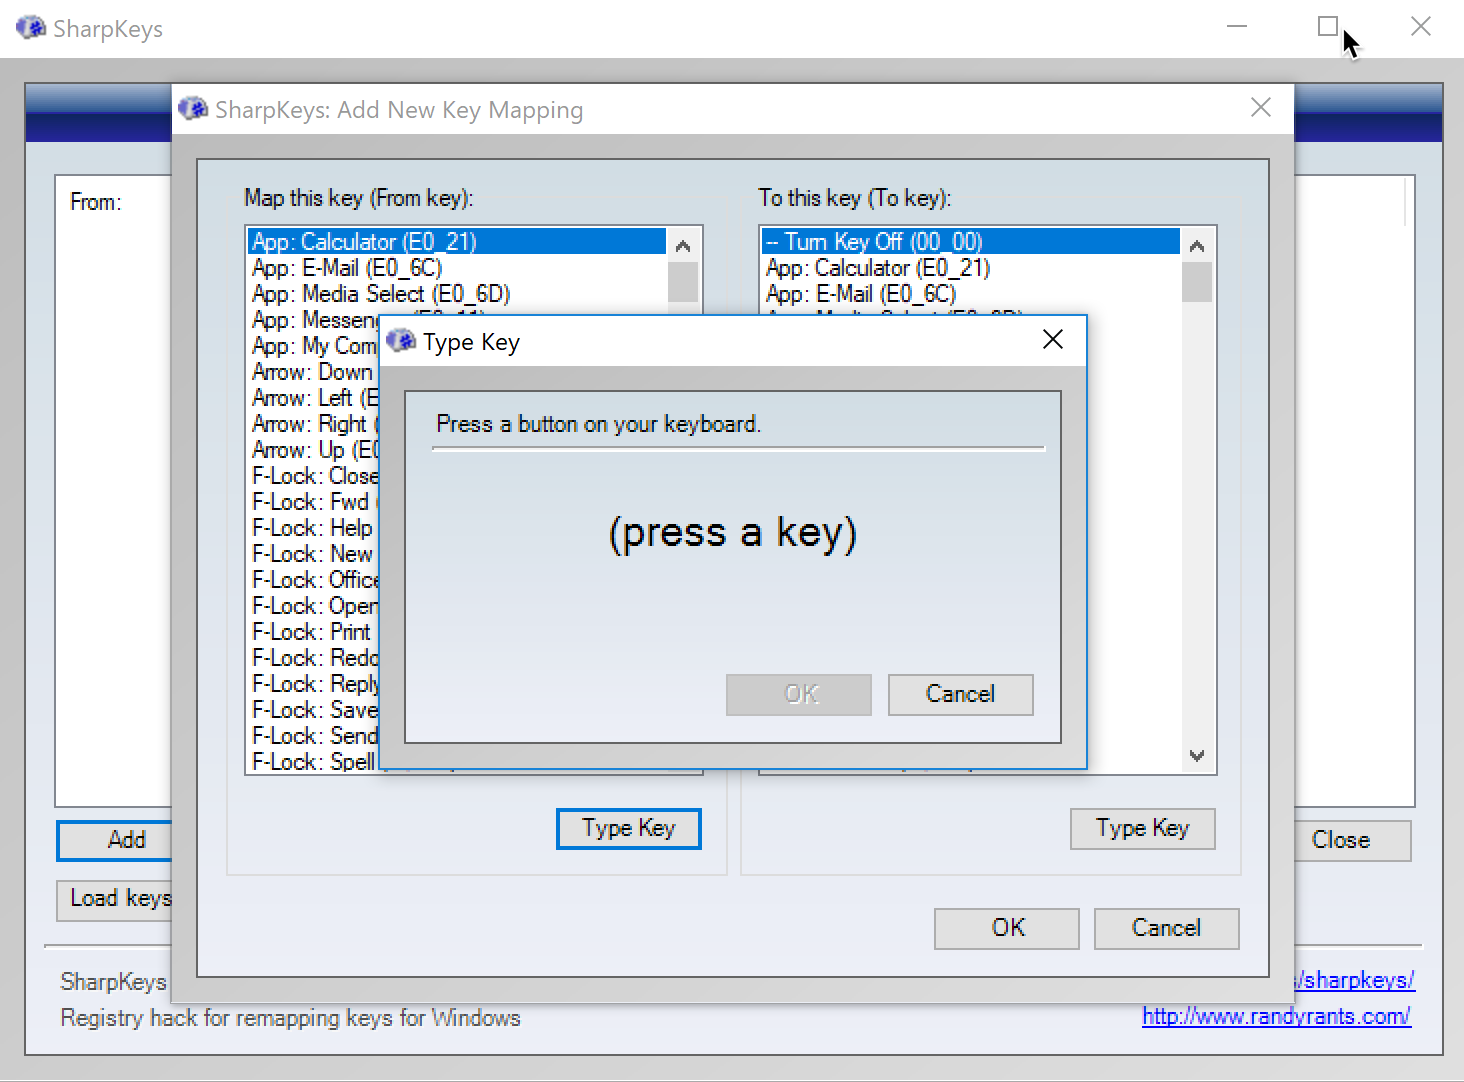
- Or just find the key you want to replace on the list manually. That key will be highlighted on the left column.
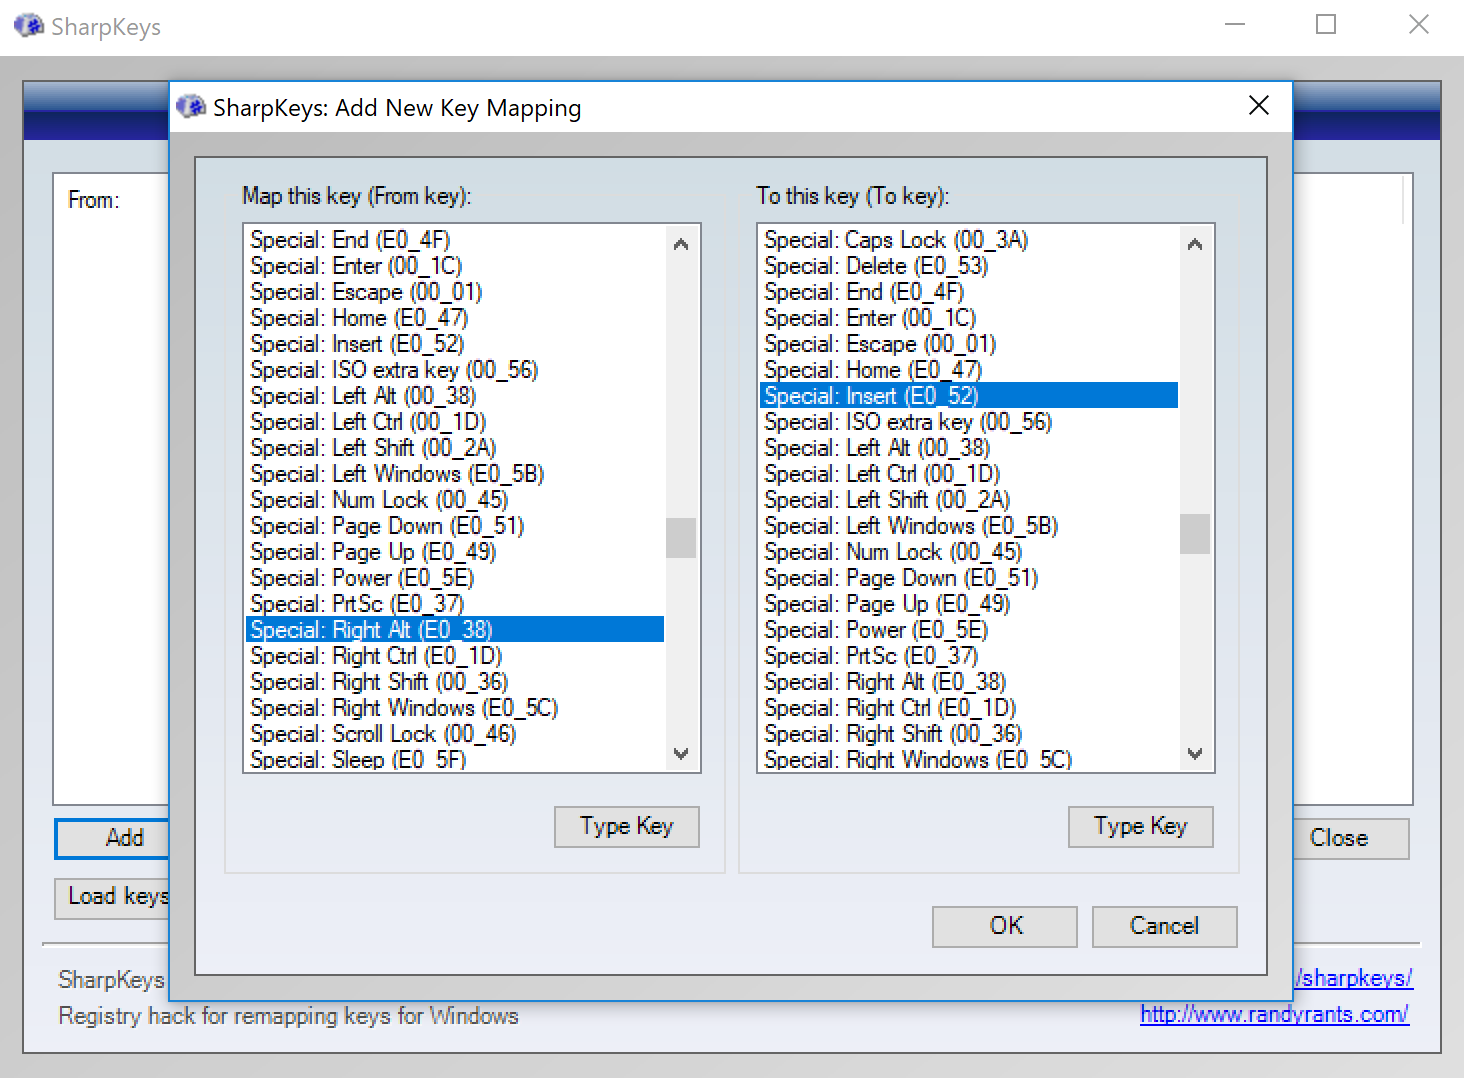
Note: You can choose any keyboard key to map, but it makes sense to use a key that is duplicated on your keyboard so you do not lose any functionality. Examples of this include: left or right alt key, or the left or right control key.
- In the right column, choose the "Special: Insert" key to map the actual key to the virtual key.
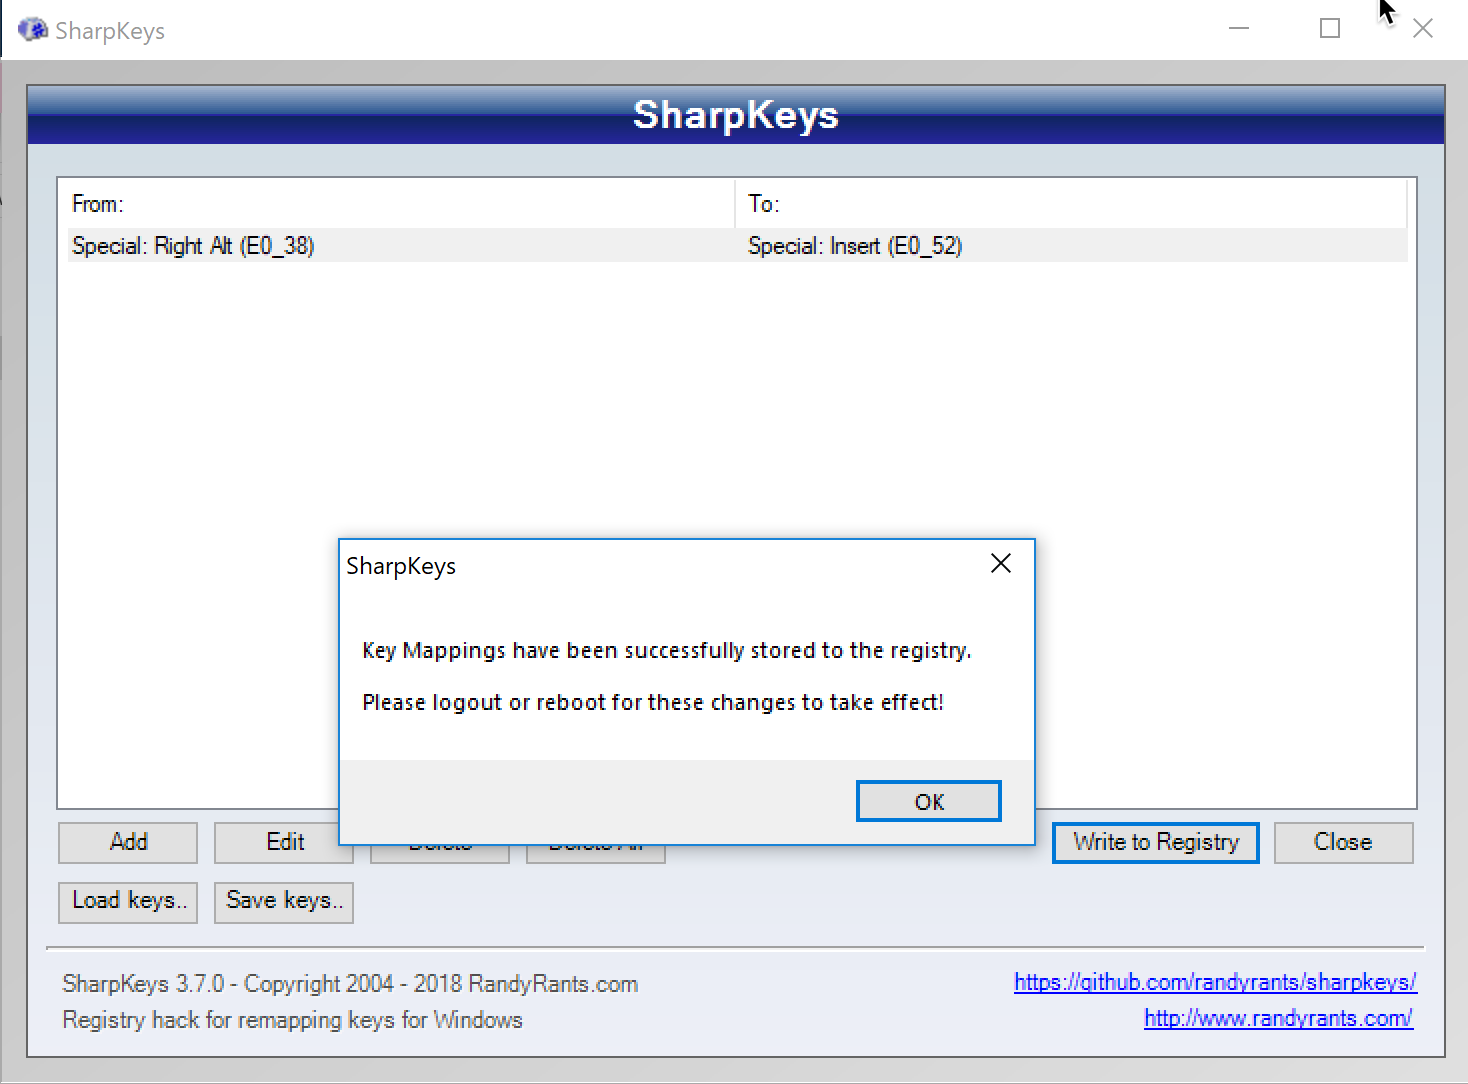
- Reset the virtual machine before testing the new mapped keys.
Option 3: Software - Karabiner Elements
For some newer Mac machines with touch bars, SharpKeys may not be the best solution. However, there is an alternate open source program called Karabiner Elements that is a powerful and stable keyboard customizer that should work if SharpKeys doesn't.
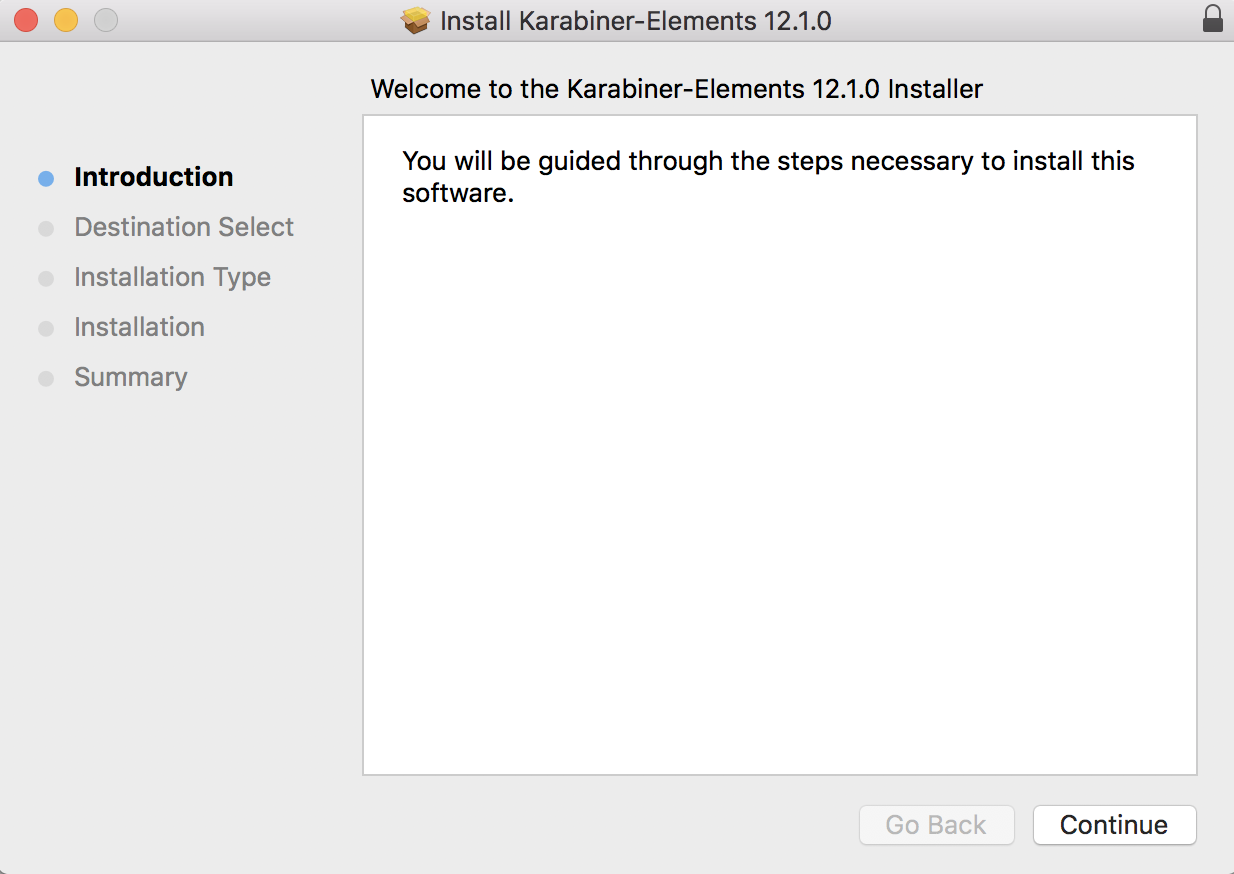
- Download the Karabiner Elements program to your Mac - NOT on your virtual machine. Make sure you pick the version that matches your Mac operating system. You can find this information under the Apple logo => About this Mac.
- Run through the installation set-up and open the Karabiner Elements program - NOT the Karabiner EventViewer program.
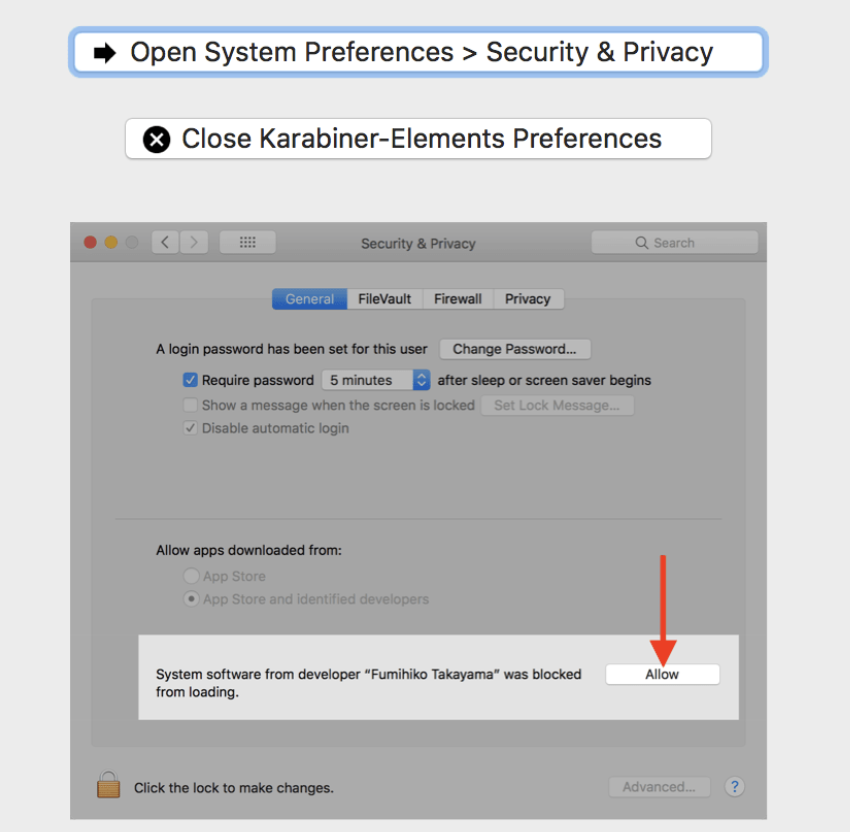
- While the program is running, go to System Preferences => Security and Privacy. Press the "Allow" button.
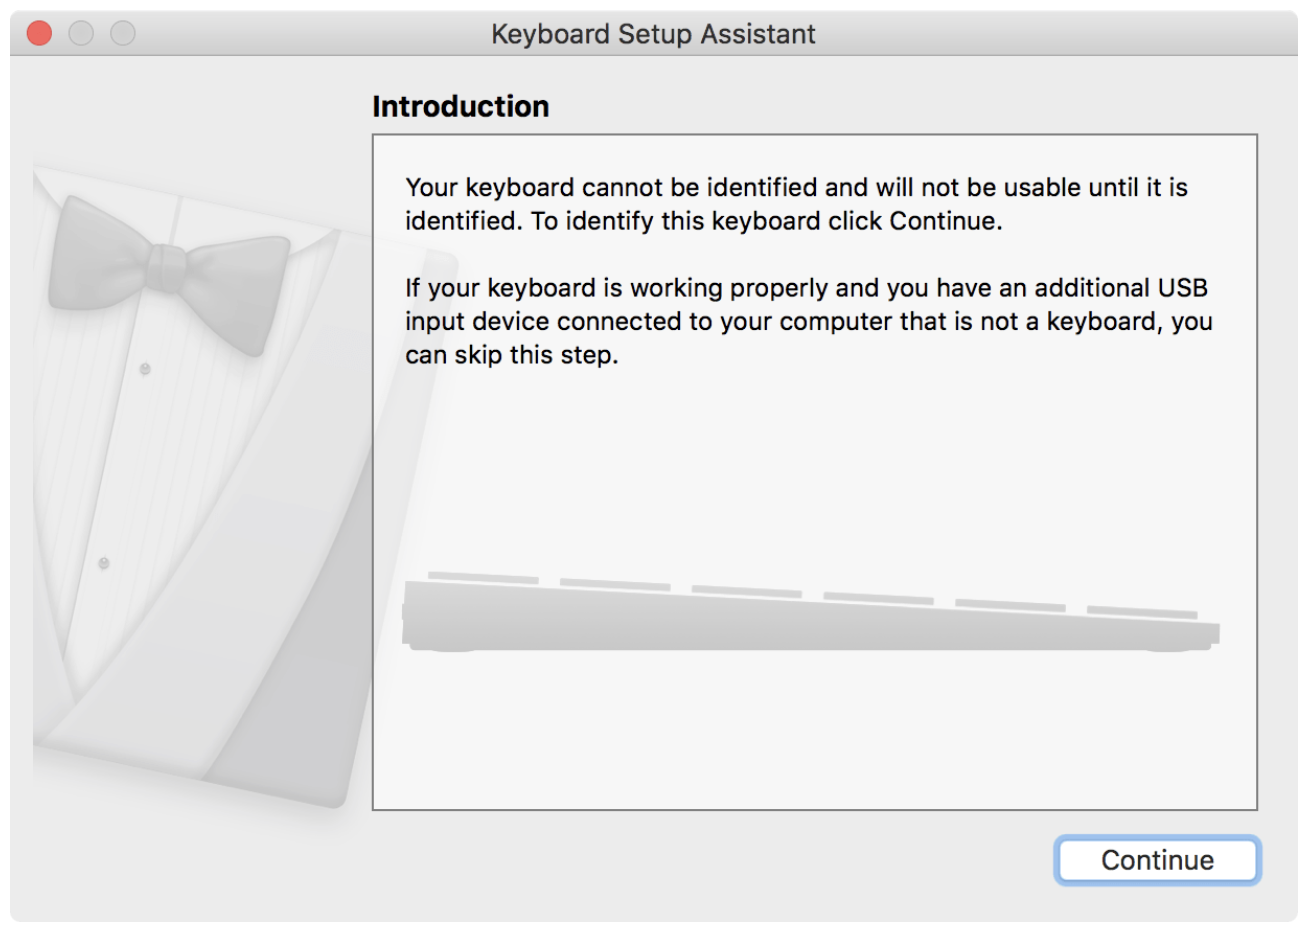
- Go back to the Karabiner Elements program and run through the Keyboard Setup Assistant to find your computer's keyboard.
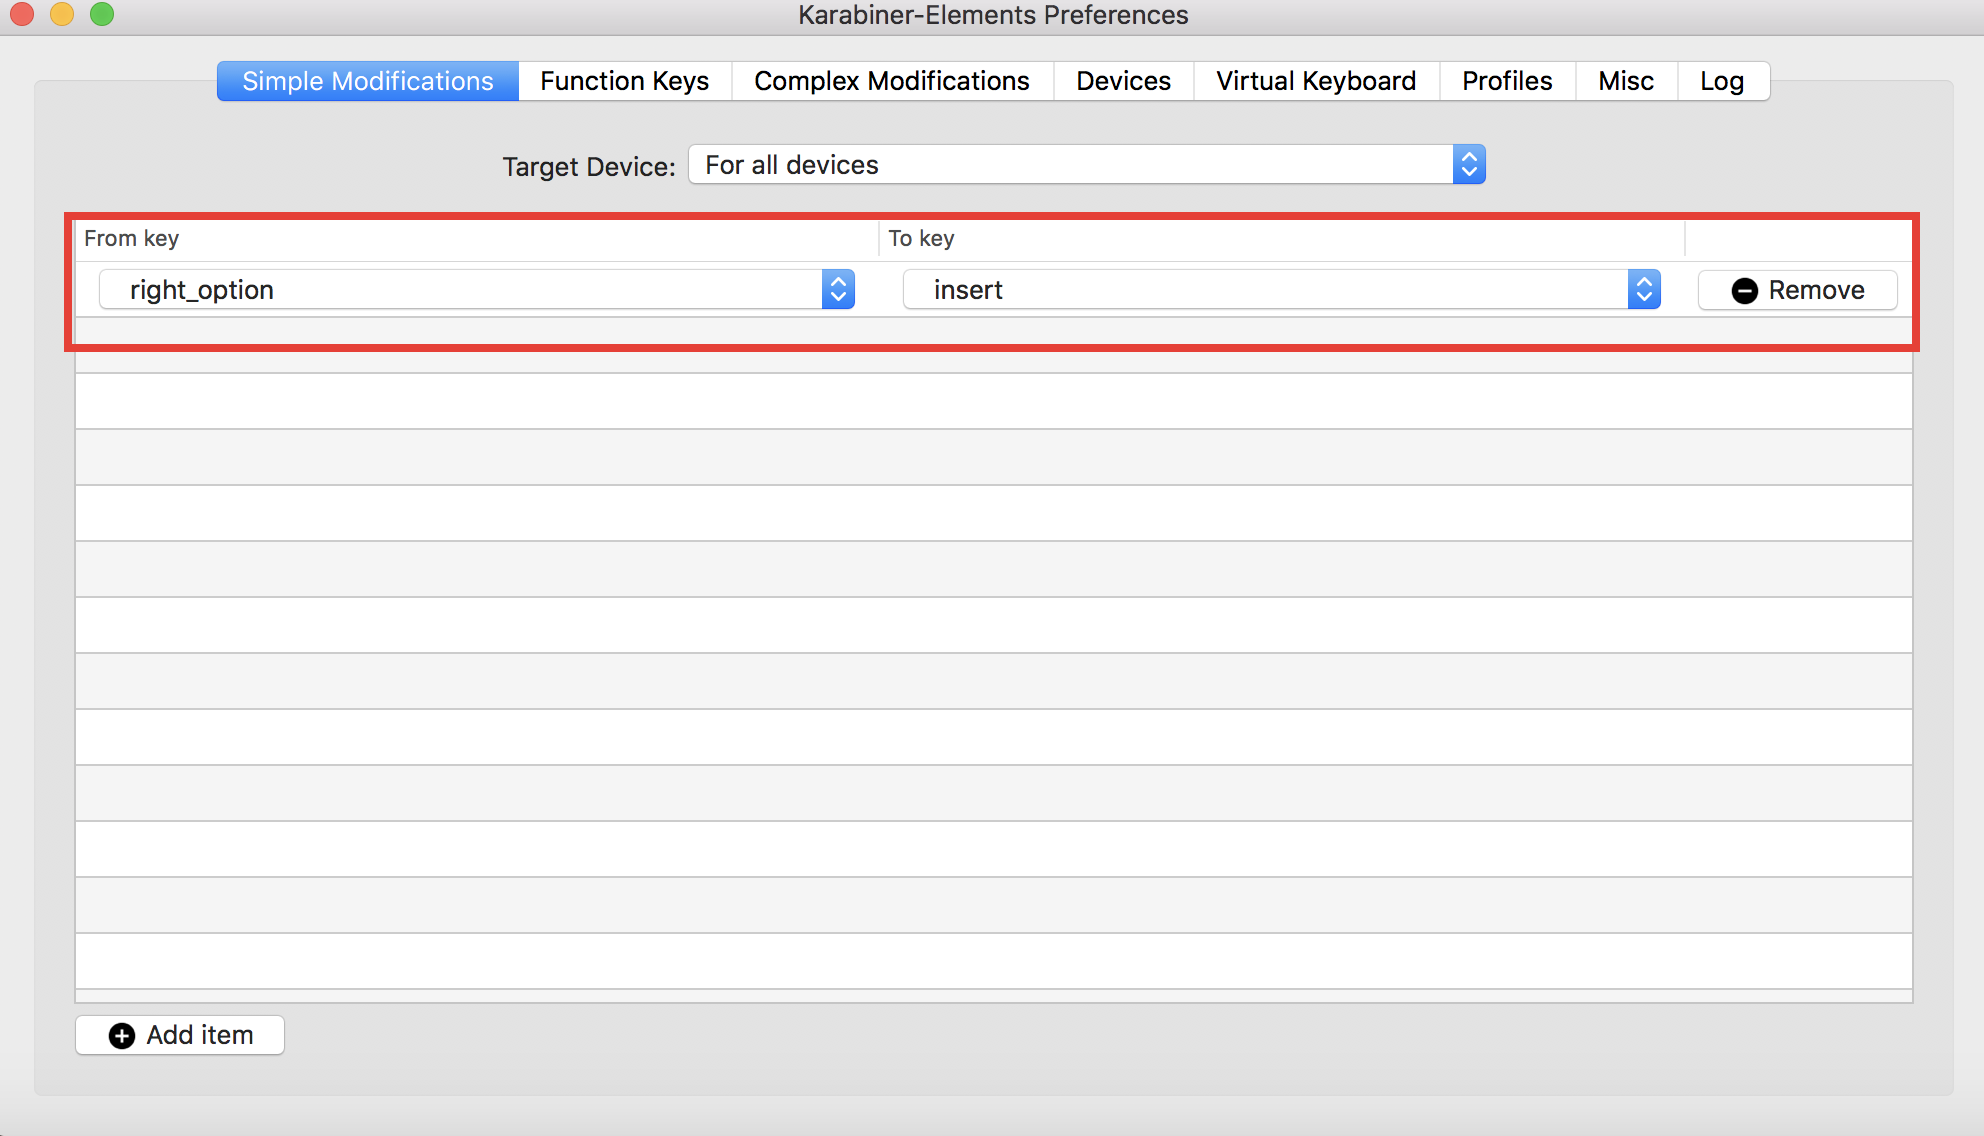
- Next, go to the "Simple Modifications" tab to map an unused key to the insert key.

- Open up your virtual machine and test out your new insert key.
Bonus NVDA settings:
- Install the Focus Highlight addon for NVDA which makes it easier to see what object currently has each of NVDA’s different focus targets.
- Enable the "Speech Viewer" log window via NVDA Menu => Tools => Speech Viewer so you can see what NVDA is saying more easily.